


In this article, I’m going to tell you how to create a certificate manager in AWS which will provide a free SSL certificate to the domain. We have several services through that we can generate free SSL certificates such as AWS, ZeroSSL, Cloudflare, Free SSL Certificates, Hostinger, and many more. Here I’m going to deal with AWS.
To this extent, I have outlined below the necessary few steps: 1: Create an account on AWS 2: Search AWS Certificate Manager(ACM)
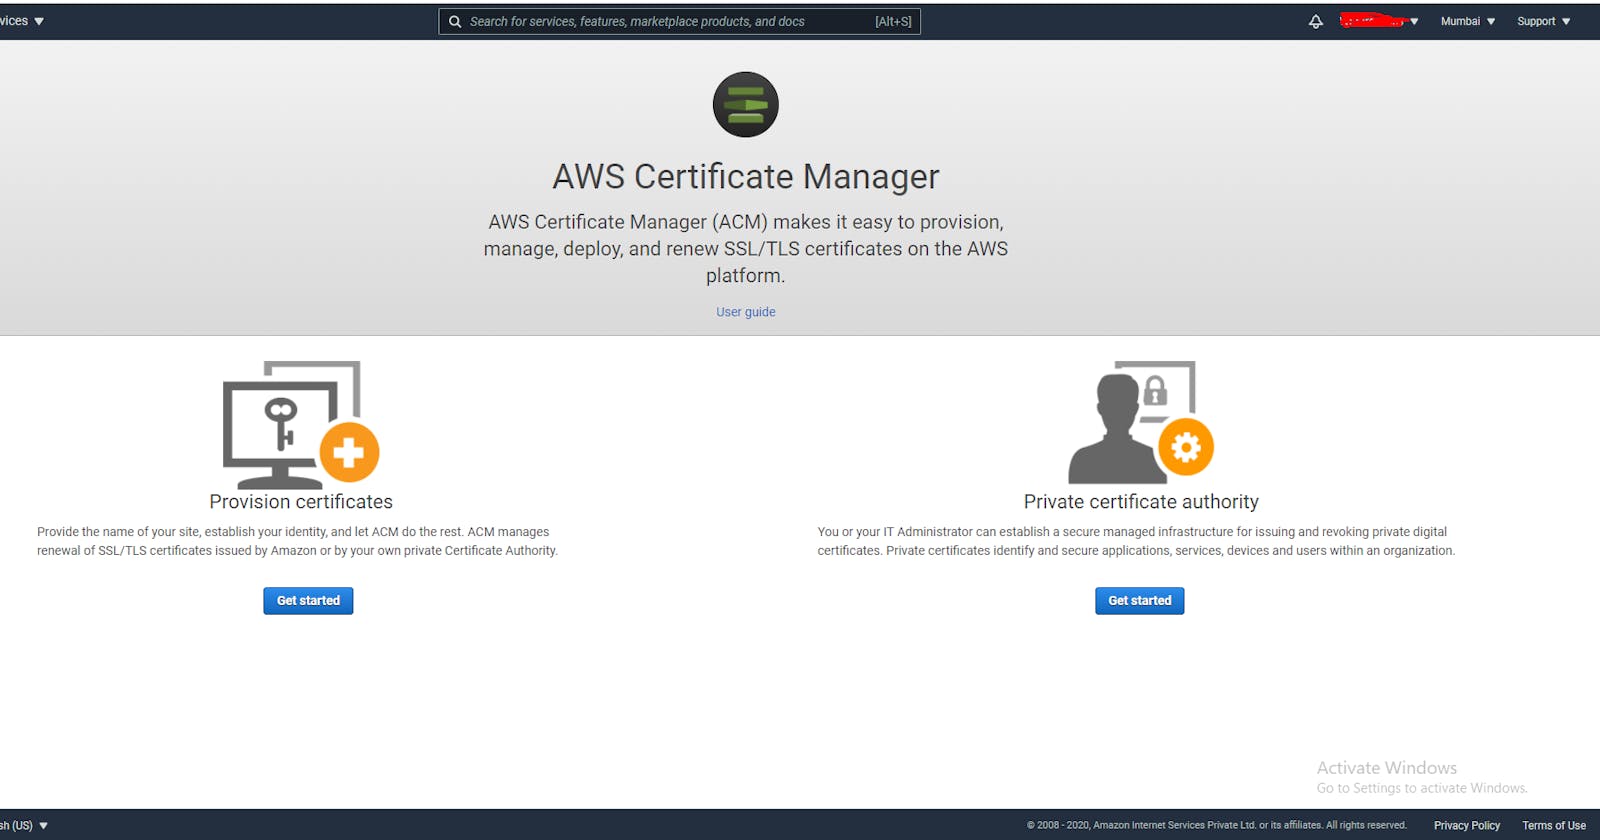
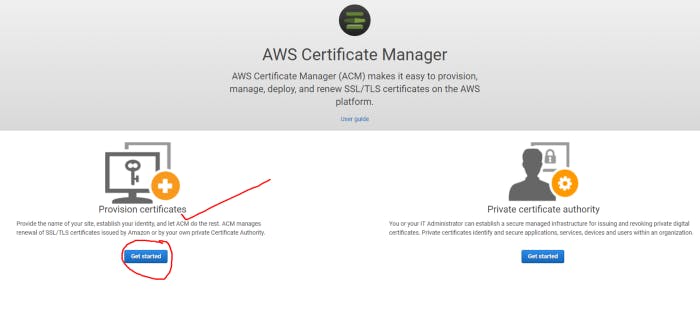
After following the above steps now we’ll start creating an SSL certificate. To do this first search for AWS Certificate Manager from the search menu, on the very first page there are two options are available Provisional Certificate Manager and Private Certificate Manager, we are using Provisional Certificates Manager which is provides the name of our sites and establish our identity, we’ll get this step-by-step.
Step 1: Select the Provisional Certificate and click on the Get Start button.
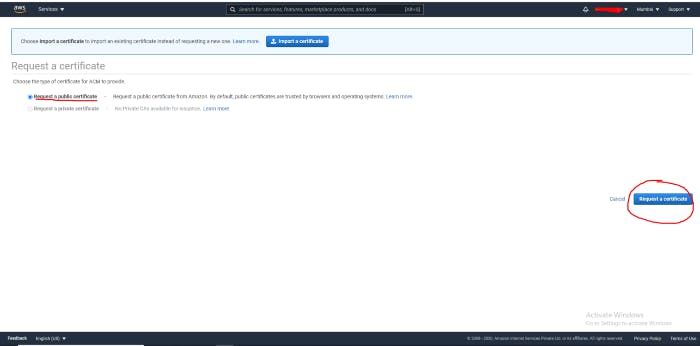
Step 2: Now we need to request a public certificate for our domain, on the next page select Request a public certificate and click on the Request a Certificate button.
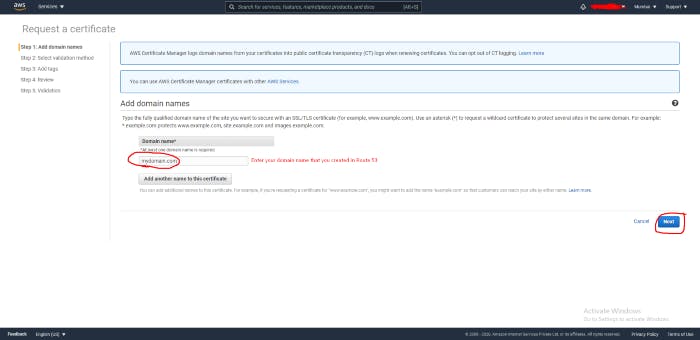
Now enter the name of your domain (mydomain.com) and hit the Next button to Add domain name.
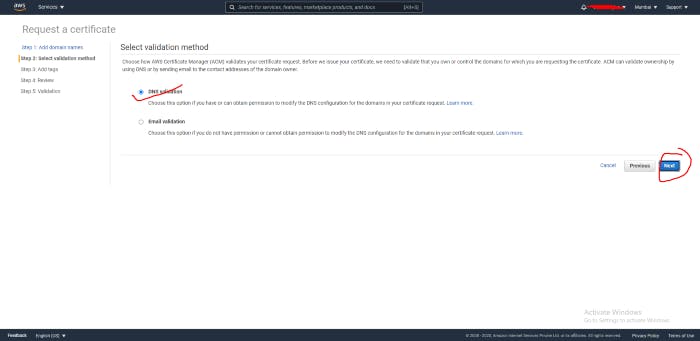
Select Validation Method: Next step is to the validation of our domain, we can validate our DNS by two methods either DNS Validation or Email Validation method (AWS provides these two options). We’ll validation our domain using the DNS validation method, choose DNS validation, and hit the Next button.
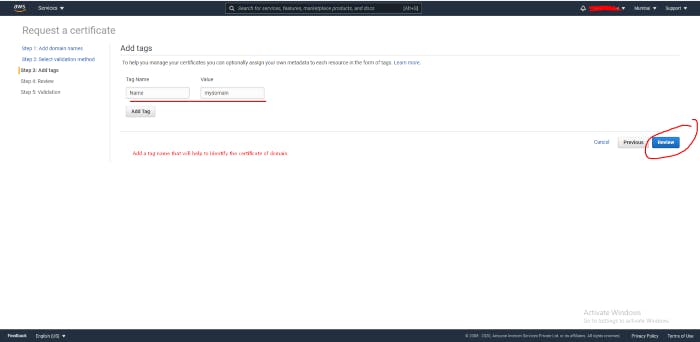
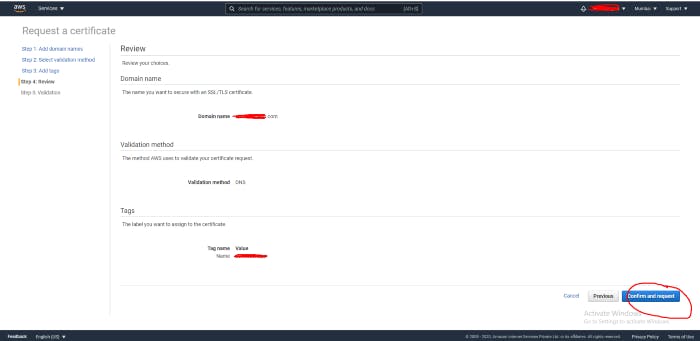
On the next page, you can add a Tag name that will help you to identify the certificate of the Route 53 domain, and click on the Review button where you’ll get all details that you entered yet from the first page, now hit the Confirm and request button.
After requested it’ll generate a Type CNAME record that needs to add to our domain records, here we do it in an easy way by hitting the Create records in Route 53 button that you’ll get after extracting the certificate name by hitting on the small icon shown before mydomain.com.
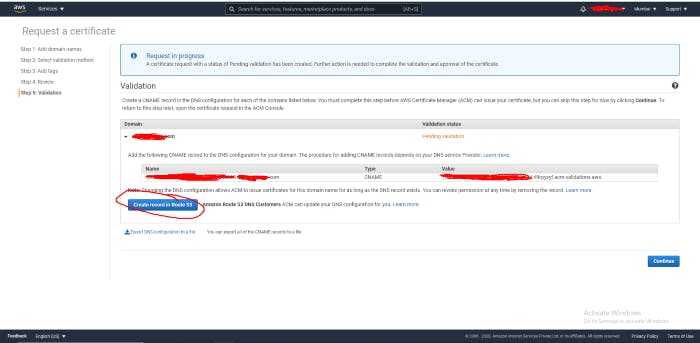
When you click on the Create records in Route 53 a new page will open having Type CNAME and its Value then click on the Create button.
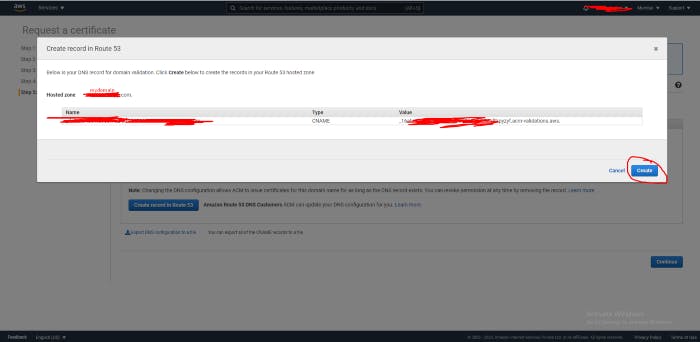
After hitting the Create button you’ll get a success message that the DNS record was written to your Route 53 hosted zone, now click on the Continue button the check the Validation status of the certificate.
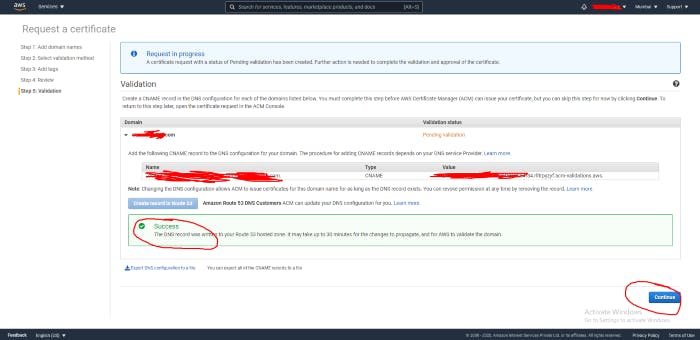
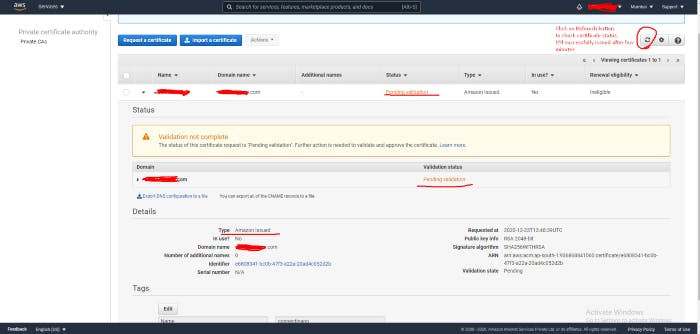
After this step, Amazon will issue a valid certificate, that we link with our domain as a Free SSL dome some time, to check certificate status click on the refresh button.
Now go to Route 53 and check available records of your domain.
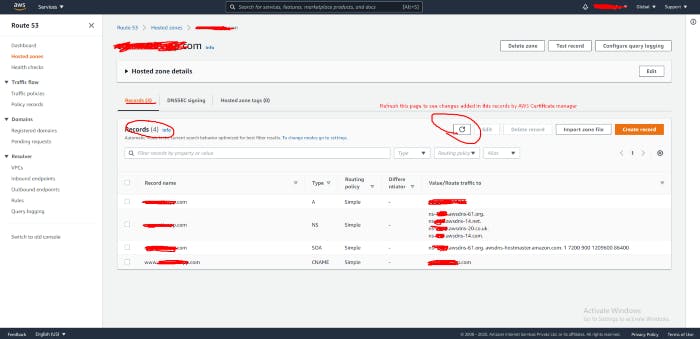
Hit the refresh button to see changes.
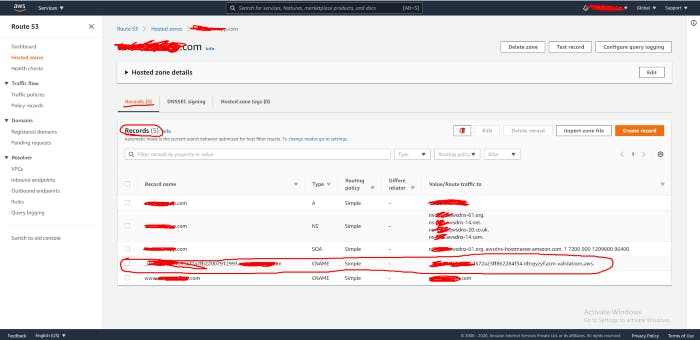
Now you are able to see new records that have been added in the Route 53 hosted zone after refreshing the page now again go back to the AWS Certificate Manager and refresh the page to see the changes.
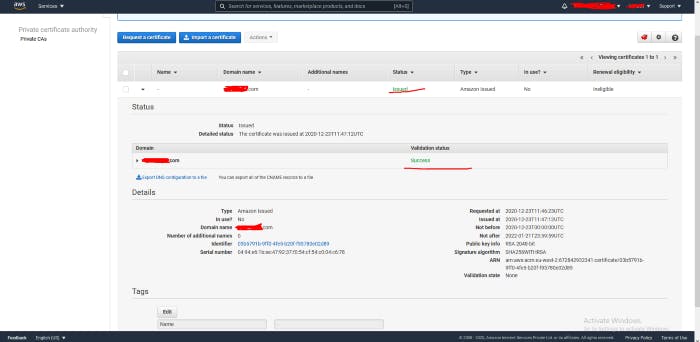
if you still see the pending status then wait for a few minutes it’ll automatically validate the certificate for the domain mydomain.com. Conclusion This is kind of the successful creating AWS Certificate Manager from AWS. If you like please leave a comment and clap for it Thank You. :)